1 Point Perspective Drawing - Simple Shapes
Today we are going to learn/practice making cubes in one point perspective. This is a system where you are able to use lines that go back to a vanishing point to make the cubes look like they are 3 dimensional on a two dimensional paper.
You will need
-PAPER
-A RULER OR STRAIGHT EDGE (if we don't have rulers, you can use the side of a book or something else that has a straight edge)
-PENCIL
BASIC OUTLINE OF STEPS (SHOWN BELOW WITH PHOTOS)
1. draw a line (horizon line) across the center of the page
2. put a dot (vanishing point) in the middle of this line
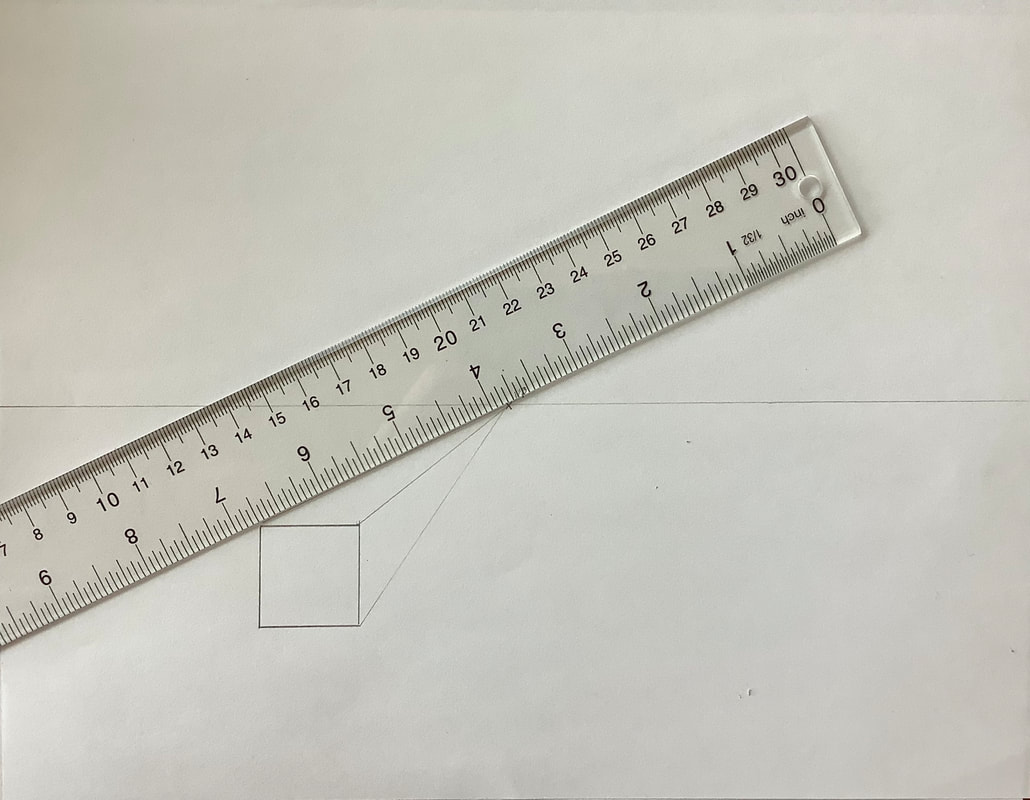
3. Draw a lead shape (square) below the horizon line
4 using SUPER light lines, connecting the vanishing point with the corners on the square.
5. draw in the top and side lines to help close off the sides we can see. It will be one horizontal and maybe one vertical line. Make sure they are parallel to the sides of the original shape.
6. Make the lines you are going to keep darker and erase the lines you don’t need.
I'd like for you to use the document that is embedded below as a guide to how to make cubes using a vanishing point.
You will need to use the arrows at the side of the document to scroll through the pages.
TAKE YOUR TIME.
PRACTICE.
DO YOUR BEST TO GET IT RIGHT, NOT JUST DO IT. IF IT DOESN'T LOOK RIGHT, PLEASE TRY AND TRY AGAIN UNTIL IT LOOKS RIGHT.
You will need
-PAPER
-A RULER OR STRAIGHT EDGE (if we don't have rulers, you can use the side of a book or something else that has a straight edge)
-PENCIL
BASIC OUTLINE OF STEPS (SHOWN BELOW WITH PHOTOS)
1. draw a line (horizon line) across the center of the page
2. put a dot (vanishing point) in the middle of this line
3. Draw a lead shape (square) below the horizon line
4 using SUPER light lines, connecting the vanishing point with the corners on the square.
5. draw in the top and side lines to help close off the sides we can see. It will be one horizontal and maybe one vertical line. Make sure they are parallel to the sides of the original shape.
6. Make the lines you are going to keep darker and erase the lines you don’t need.
I'd like for you to use the document that is embedded below as a guide to how to make cubes using a vanishing point.
You will need to use the arrows at the side of the document to scroll through the pages.
TAKE YOUR TIME.
PRACTICE.
DO YOUR BEST TO GET IT RIGHT, NOT JUST DO IT. IF IT DOESN'T LOOK RIGHT, PLEASE TRY AND TRY AGAIN UNTIL IT LOOKS RIGHT.

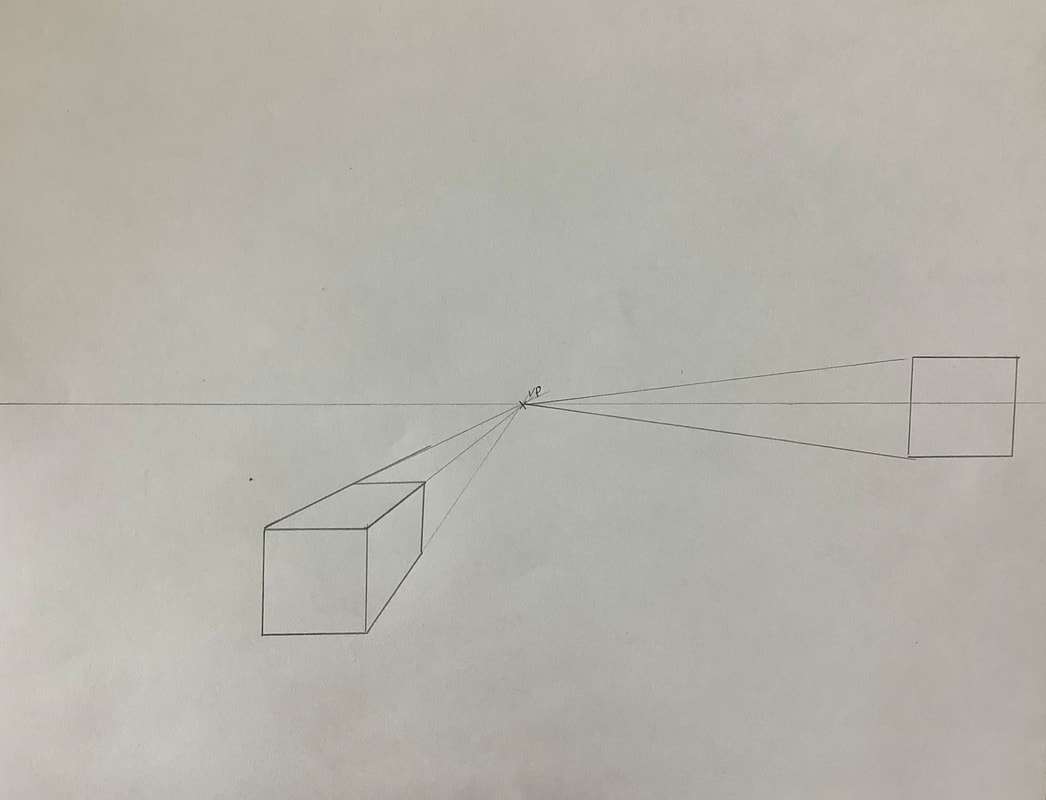
1. draw a line (horizon line) across the center of the page
2. put a dot or x (vanishing point, labeled with vp in this picture) in the middle of this line
3. Draw a lead shape (square) below the horizon line
2. put a dot or x (vanishing point, labeled with vp in this picture) in the middle of this line
3. Draw a lead shape (square) below the horizon line
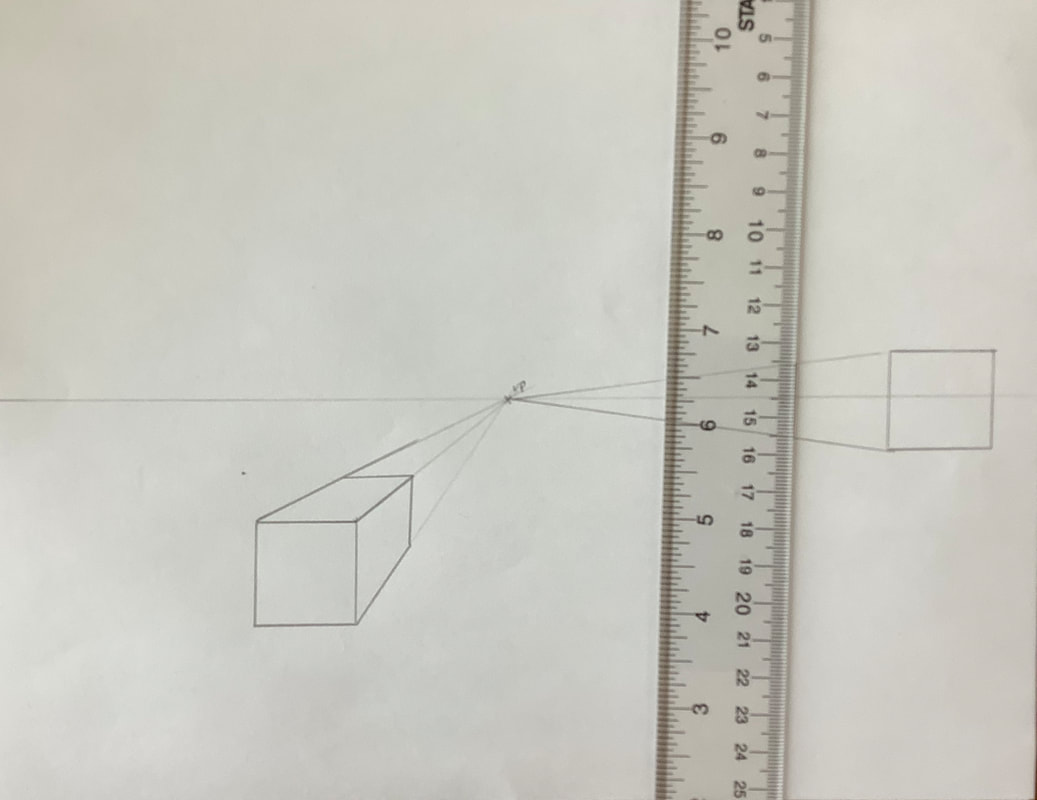
4. Using SUPER light lines, connecting the vanishing point with the corners on the square.
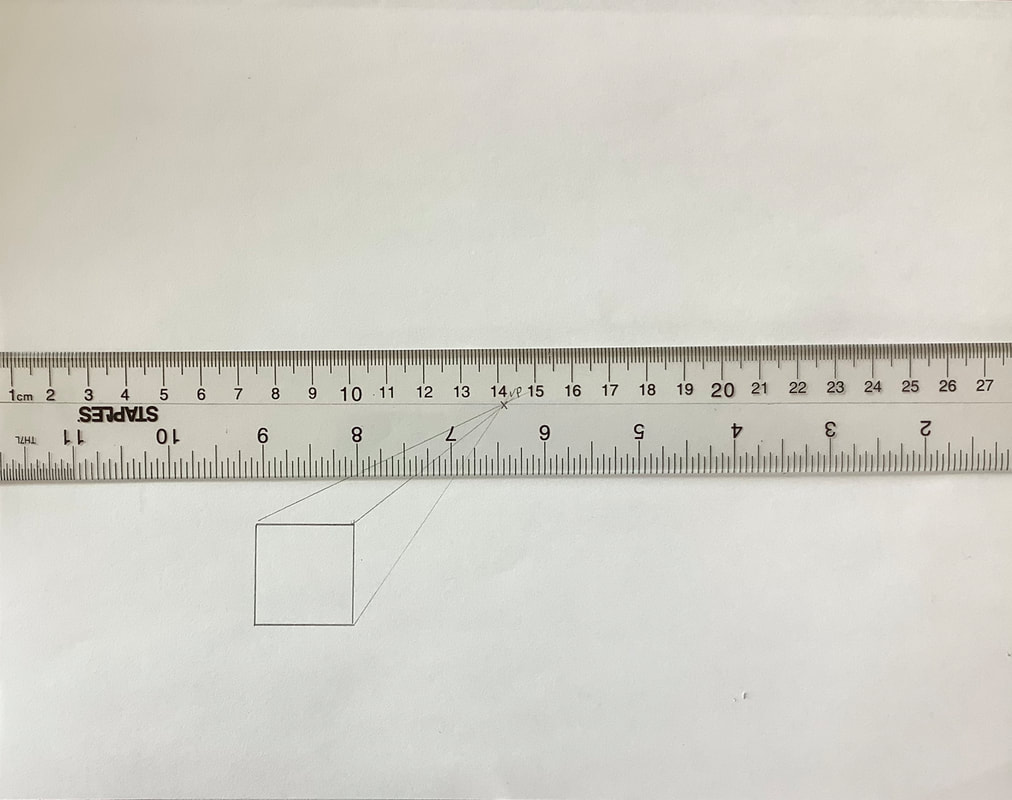
5. draw in the top and side lines to help close off the sides we can see. It will be one horizontal and maybe one vertical line. Make sure they are parallel to the sides of the original shape.
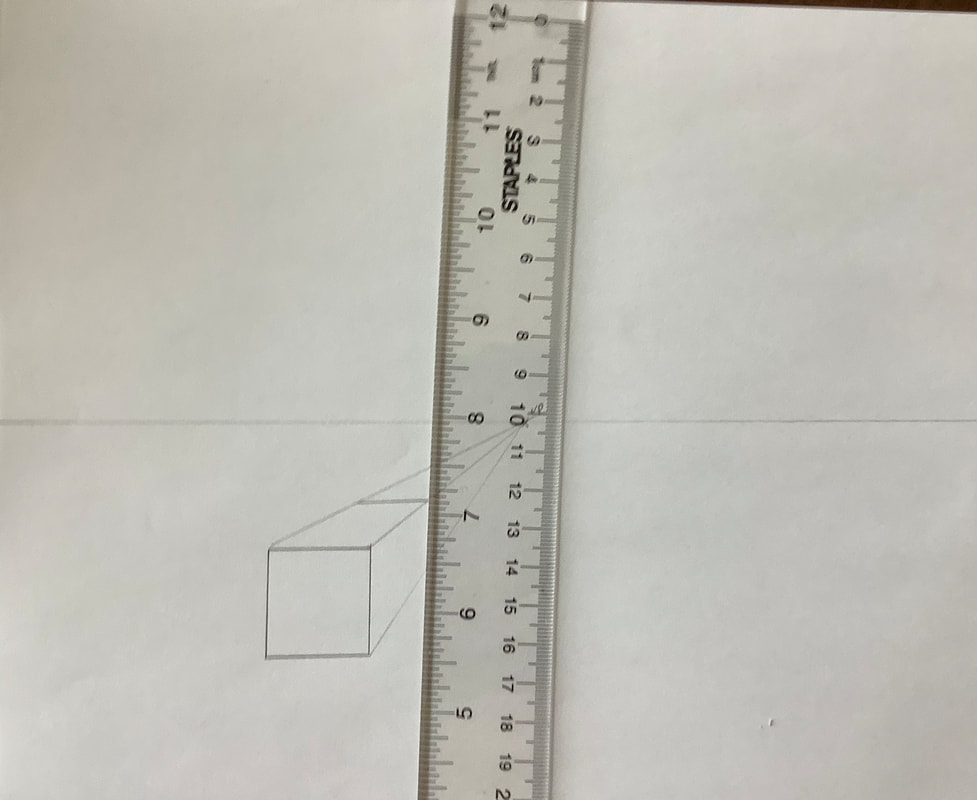
5. draw in the top and side lines to help close off the sides we can see. It will be one horizontal and maybe one vertical line. Make sure they are parallel to the sides of the original shape.
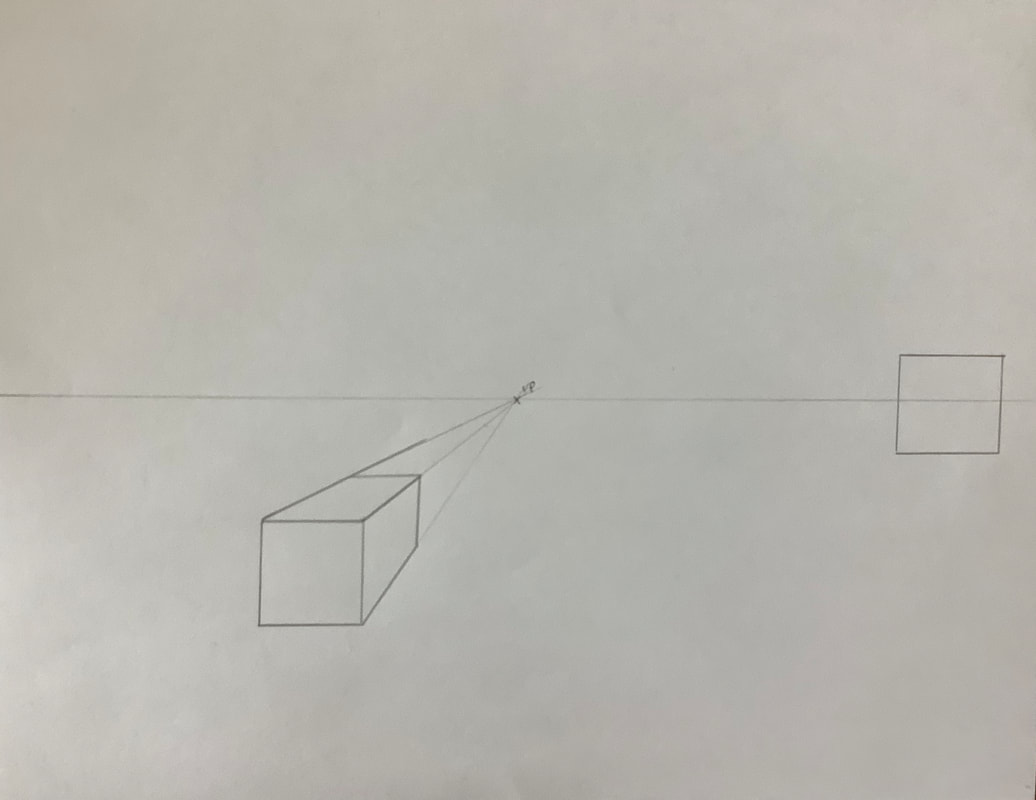
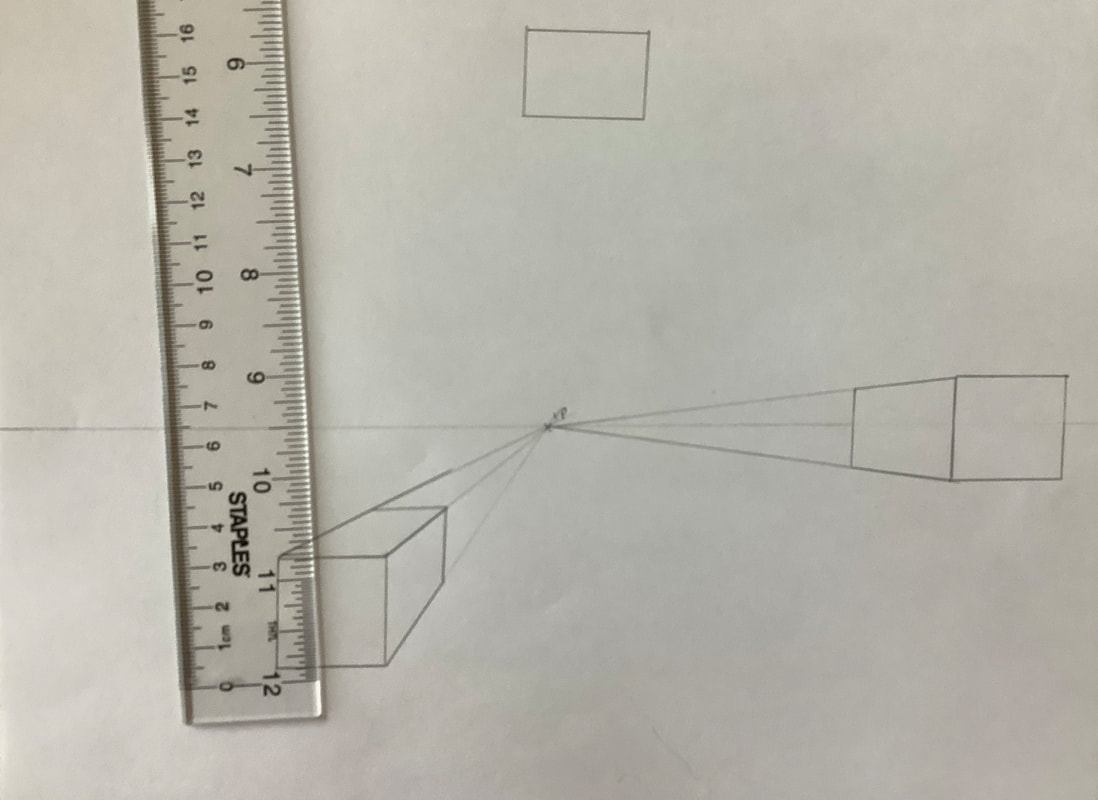
Draw a lead shape (square) on the horizon line
4. Using SUPER light lines, connecting the vanishing point with the corners on the square.
Draw in the side line to help close off the side we can see. It will be one vertical line. Make sure it is parallel to the side of the original shape.

Draw in the side line to help close off the sides we can see. It will be one vertical line. Make sure it is parallel to the sides of the original shape.
Draw a lead shape (square) above the horizon line
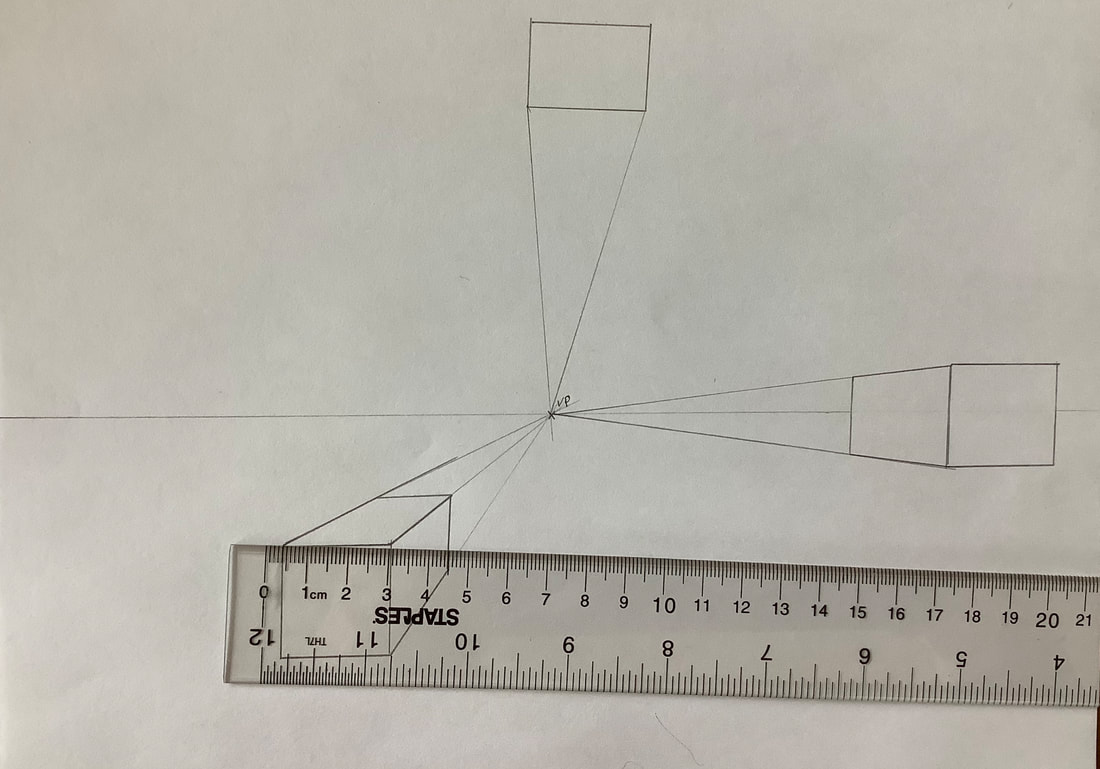
Using SUPER light lines, connecting the vanishing point with the corners on the square.
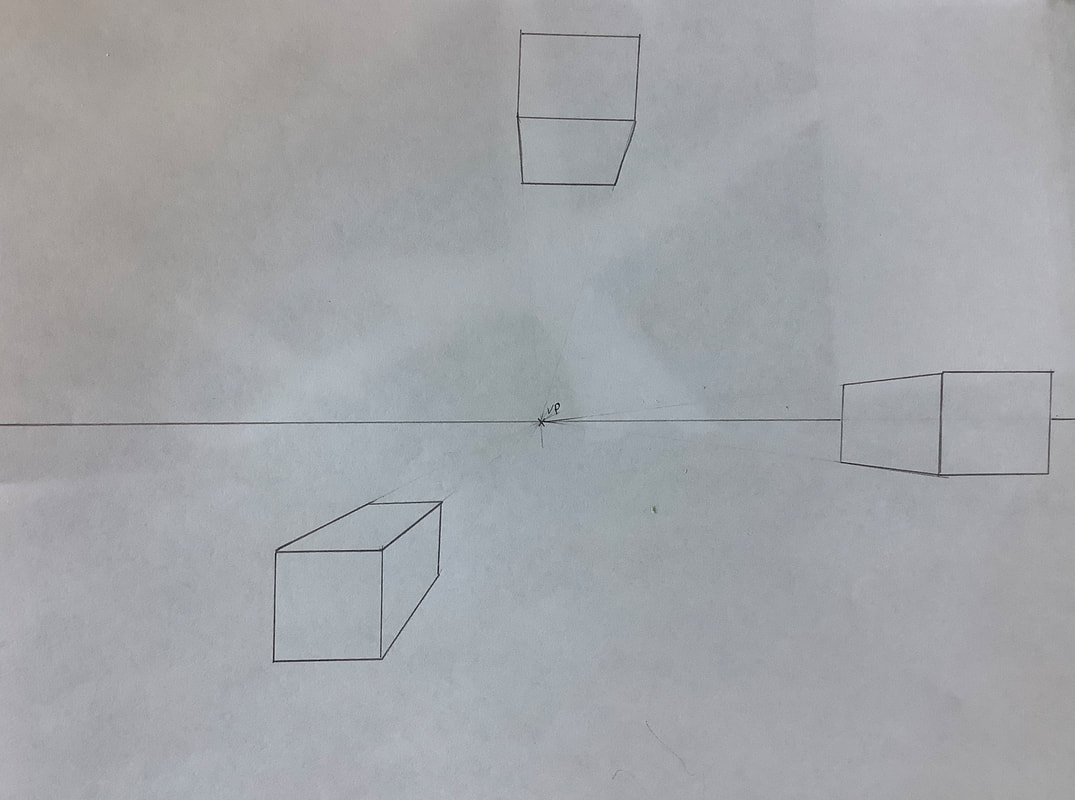
Draw in the line to close off the bottom side of the shape. Make the lines you are going to keep darker and erase the lines you don’t need.
